Buying dill air control products is not simply a matter of choosing the lowest online price. Fit, pressure accuracy, material quality, and technical support can affect every service decision. A valve may look correct on a workshop counter yet fail because its sensor compatibility is wrong. Small details matter.
Tom Wenzel, an industry specialist associated with Dill Air Controls, advises, “The right part is the one that matches the vehicle, the sensor, and the service requirement.” This practical view supports a careful buying process. Buyers should check product specifications, application data, valve-stem dimensions, pressure ratings, and TPMS compatibility before ordering. They should also review warranty terms and supplier credibility. A polished product page is not proof of dependable quality.
This guide presents seven practical tips for selecting dill air control products with greater confidence. It considers product fit, supplier experience, genuine components, installation guidance, and after-sales support. It also asks an uncomfortable question: are we choosing performance, or only convenience? That distinction matters when a component will face vibration, temperature changes, and repeated servicing. Keep records. Compare details. Ask technical questions.
Some choices still involve judgment. Product information can be incomplete. Even experienced technicians can overlook an unusual application. A second check is worthwhile. By combining hands-on inspection with verified technical information, buyers can reduce avoidable mistakes and make more reliable purchasing decisions.
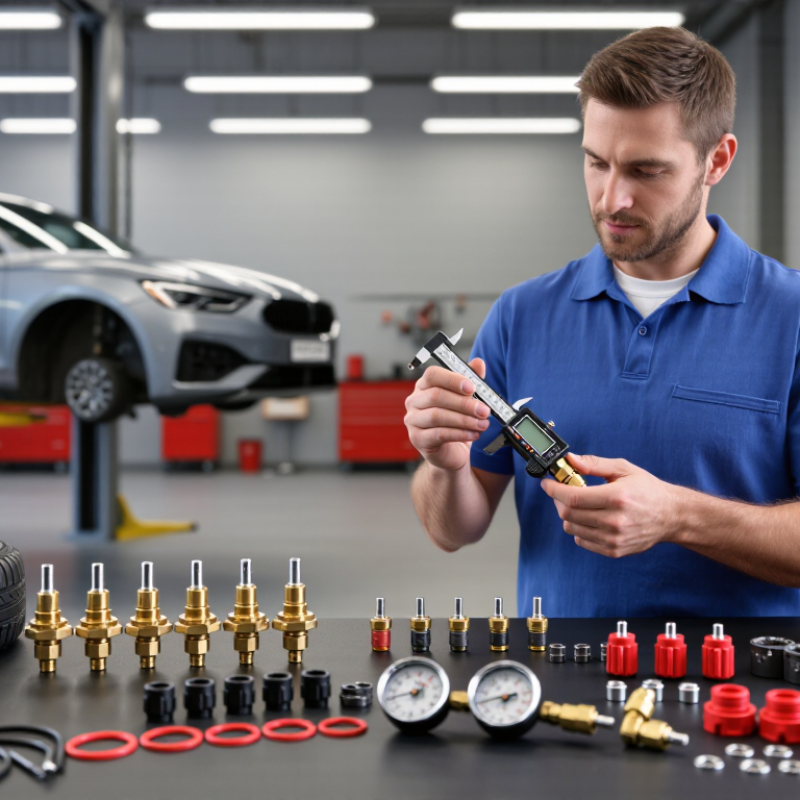
Buying air control components requires more than matching a product photo. The correct choice depends on the vehicle, wheel design, sensor system, pressure range, and service conditions. Check the vehicle identification number, model year, wheel size, and original equipment specifications before ordering. A visual match can still be wrong.
Tip 1: Confirm the exact application.
Tip 2: Check the required sensor frequency and communication method.
Tip 3: Match the valve stem material, angle, and mounting style.
Tip 4: Verify the approved pressure range.
Tip 5: Inspect whether a complete sensor or service kit is needed.
Tip 6: Check compatibility with the wheel’s valve hole and rim thickness.
Tip 7: Confirm relearning or programming requirements before installation.
Experienced technicians usually compare catalog data with the part removed from the vehicle. Measure the valve stem. Inspect the seal, cap, nut, and sensor housing for wear. Do not reuse damaged sealing hardware, even when the sensor still appears functional. Some applications vary between production batches, which makes a second fitment check worthwhile. I have found that the small details often decide whether installation is smooth or frustrating. A product may fit physically but fail electronically, or it may require a different reset procedure. Keep the vehicle manual and installation instructions nearby, and record the original pressure setting before replacing components.
Check the vehicle before checking the product. Record the make, model, production year, and wheel position. Some vehicles use different sensors on the same model year. Confirm the required sensor frequency, communication type, and pressure range. A product that looks suitable may still fail during relearning.
Inspect the valve carefully. Measure the stem length, mounting angle, hole size, and sealing surface. Metal and rubber valves may require different service kits. Check whether the valve fits the existing sensor body. Never assume a universal seal will solve every mismatch. I once focused on the sensor and ignored the valve angle. The installation looked neat, but the stem touched the wheel opening. That shortcut was wrong.
Read the tire information on the sidewall and inside the driver’s door. Compare the tire size, load rating, maximum pressure, and wheel diameter with the product specifications. Consider winter tires, temporary spare tires, and aftermarket wheels. Their requirements can differ from the original setup. Keep the old valve beside the replacement while comparing threads and washers. A small difference matters. Verify the package contents, installation tools, torque requirement, and relearning procedure. If the catalog is unclear, pause and request technical confirmation using the vehicle identification details. It may feel slow. It is cheaper than removing a mounted tire twice. After installation, check for leaks with soapy water and confirm the dashboard reading after driving.
When buying air-control products, compare features against your daily working conditions. A clear digital display helps in dim garages, while a mechanical dial can work without batteries. Check the measurement range, unit options, hose length, and chuck design. A rotating chuck is useful when valve stems sit behind narrow wheel openings.
Accuracy deserves practical testing. Measure the same tire twice, then compare the reading with a recently calibrated reference gauge. Keep tires cold, because heat changes pressure and can distort your judgment.
A difference of 0.1 to 0.2 psi may matter for careful maintenance. However, advertised precision does not always equal real-world accuracy. I once trusted a new gauge without checking it, and its readings were slightly inconsistent.
Durability depends on more than a metal outer case. Look for reinforced hose connections, protected screens, strong valve seals, and a handle that feels secure with oily hands. A rubber guard can reduce damage after an accidental drop.
Ease of use matters, too. The trigger should respond smoothly, and the display should remain visible while crouching beside a wheel. Products with simple controls are often easier to use correctly.
Still, simple is not always better. A basic model may lack automatic shutoff or pressure memory, which could slow repeated checks during busy service work. Read the calibration instructions before relying on any device.
Check certification documents before comparing prices. Request current test reports, certificate numbers, and issuing-body details. Do not trust a logo alone.
Match each certificate to the exact product model, pressure range, and intended application.
Ask for material records and production traceability. In my experience, clear serial numbers make inspections faster. They also expose documentation gaps early. I once accepted a polished certificate without checking its product scope. That shortcut was a mistake.
Read the warranty carefully. Confirm the coverage period, start date, replacement process, and labor responsibilities.
Look for exclusions involving corrosion, installation errors, contaminated air, or improper storage. These details matter beside a compressor room’s heat and dust.
Ask how quickly technical claims are handled. A long warranty is weak if support takes weeks. Get response times in writing. Also confirm whether spare parts remain available during the coverage period.
Test supplier reliability through references, delivery records, and technical communication. Ask for customer examples using similar pressure and flow conditions. Reliable suppliers explain limitations instead of promising everything. Request drawings, maintenance instructions, and inspection procedures before ordering. A small trial order can reveal packing quality, lead-time accuracy, and response speed. I would still review the supplier after delivery. One successful shipment proves less than consistent performance.
Buying an air control product requires more than comparing catalog prices. In field inspections, I have seen a low initial quote become expensive after shipping, fittings, and calibration were added. Ask for a complete written price. Check taxes, delivery charges, warranties, and replacement-part costs. A clear quote prevents uncomfortable surprises.
Tip 1: Confirm availability before approving the purchase. Request the actual lead time, not a general estimate. Ask whether the product is in stock or made to order. One delayed valve can hold up an entire maintenance schedule. Also verify compatible connectors, seals, gauges, and control accessories. Small mismatches create frustrating delays.
Tip 2: Discuss long-term maintenance with a qualified supplier or technician. Ask how often filters, seals, and sensors need inspection. Confirm whether service instructions are included and whether trained support is accessible. Keep records of operating hours, pressure readings, and replaced parts. This makes future troubleshooting more reliable. I once overlooked storage conditions, and the equipment degraded before installation. That mistake changed my checklist. Tip 3: Request a maintenance estimate for three to five years. Compare realistic service costs, not just purchase prices. A product with a slightly higher price may offer simpler servicing and better parts availability. Still, assumptions can be wrong. Recheck them against your operating environment, workload, and technician experience.
A practical purchasing checklist focused on pricing, availability, technical fit, and long-term maintenance requirements.
Before placing an order, confirm the written quotation, stock status, delivery schedule, operating specifications, warranty terms, replacement-part access, and planned maintenance intervals. Actual requirements may vary by application and installation environment.